I am using Eclipse Indigo and Android 4.1 (API 16) and I used Android SDK Manager (Revision 20.0.3) to download Android SDK. This article should apply to most Eclipse versions and Android versions.
Step 1: Locate Android Source Code Folder
If you use the same Android SDK Manager to download Android SDK like I did then your Android SDK's source code should be located at
C:\Program Files (x86)\Android\android-sdk\sources
The funny thing is you do NOT even need to include the closest folder that contains the source code! In this case you can even include C:\Program Files (x86)\Android\android-sdk and Eclipse still will find the source code! However it may be slower as Eclipse needs more time to find the sources.
As the Eclipse dialog suggests the source code can be a JAR, a ZIP, or a folder!
Step 2: Attach the Source Code in Your Project in Seconds!
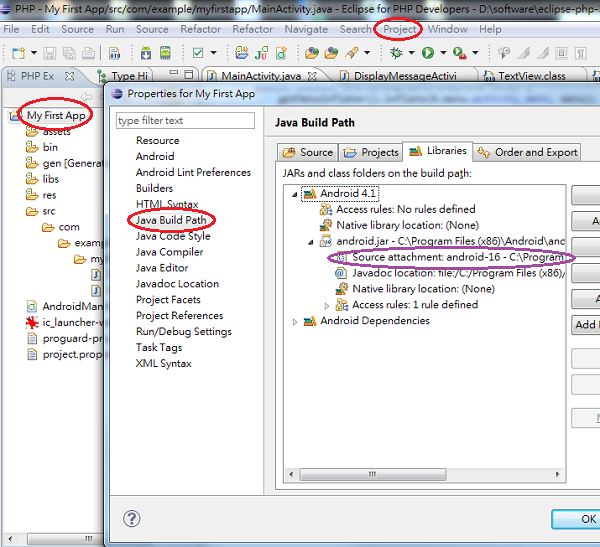
Click on your project root folder in Explorer. Go to Project -> Properties -> Java Build Path -> Libraries -> Android 4.1 (or whatever your version) -> android.jar.
In the following screenshot red circles indicates places you click on and the purple circle indicates the source code location path. Click on Edit to enter the correct Android source code folder you've found in Step 1!
If you have any questions let me know and I will do my best to help you!

