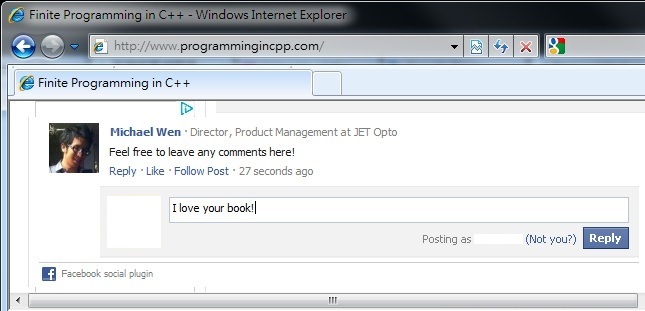
This widget allows visitors to your website to leave comments on your website in a similar look-and-feel as Facebook. An added value is that below the comment box there is a "Post to Facebook" check box which is checked by default. When the visitor submits a comment the comment is automatically posted on their Facebook wall, giving your website extra exposure!
The Problem
Despite Facebook's attempt to make installing this comment plugin as easy as possible it isn't exactly a simple task. There are small yet essential tasks you need to do here and there in order to use this comment widget the correct way. This tutorial will help you achieve the following:
- Install Facebook Comment Widget so Visitors Can Leave Comments on ANY Page of Your Site.
- You will be able to Moderate ALL Comments that are Left on Your Site Easily.
- You will be able to Control the Background Color of the Entire Comment Section
Step 1: Create a New Facebook App (5 minutes)
The purpose of creating a Facebook app is to get an app ID so that you can tie together the comments left on every page of your website and moderate them all.
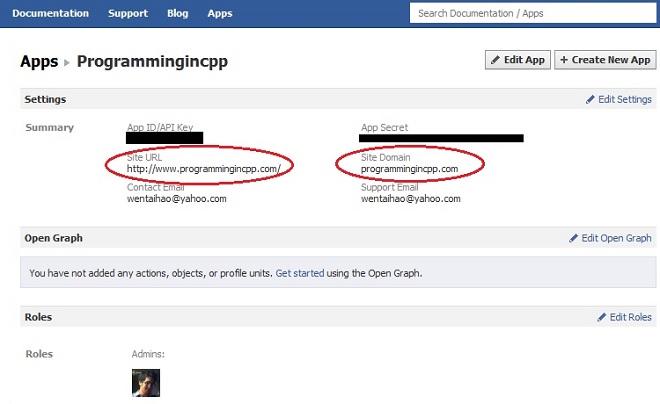
Go to https://developers.facebook.com/apps and click "+ Create New App" to create a new App. Give your app a name in the 'App Display Name' field. In order to use this app for our purposes you need to be sure to enter the correct Site URL and Site Domain. Suppose your site is https://cppprogramming.chtoen.com/. That means your Site URL is https://cppprogramming.chtoen.com/ and your Site Domain is chtoen.com.
Here's a screenshot of my app for my website https://cppprogramming.chtoen.com/:

When your app has been created note your App ID. It's referred to as "App ID/API Key' in your app settings page.
Step 2: Place Necessary Code on Your Website (5 minutes)
You are the admin for your website; therefore you'll need to let Facebook comment widget know your Facebook user ID and the App ID. Suppose your Facebook user ID is 'feedthehungry' and your App ID is '153010938422' then place the following meta tags in every page of your website:
<meta property="fb:admins" content="feedthehungry"/>
<meta property="fb:app_id" content="153010938422"/>
The level of difficulty depends on how your site works. My website runs on a PHP framework and therefore it's extremely easy for me to place this code in every page of my site. If your site simply uses static HTML pages you'll need to paste this code in every page.
Next, place the following code inside your body tag section, preferably in the very beginning:
<div id="fb-root"></div>
<script>(function(d, s, id) {
  var js, fjs = d.getElementsByTagName(s)[0];
  if (d.getElementById(id)) {return;}
  js = d.createElement(s); js.id = id;
  js.src = "//connect.facebook.net/en_US/all.js#xfbml=1";
  fjs.parentNode.insertBefore(js, fjs);
}(document, 'script', 'facebook-jssdk'));</script>
Next you place the following code where you want the comment widget to appear on your webpage. The tricky part is you'll need a way to insert the current webpage's URL into the following code. If you use PHP then you can use PHP code to get the current URL. Here's the code if your site runs on PHP:<?php $currentUrl = (!empty($_SERVER['HTTPS'])) ? "https://".$_SERVER['SERVER_NAME'].$_SERVER['REQUEST_URI'] : "http://".$_SERVER['SERVER_NAME'].$_SERVER['REQUEST_URI']; ?> <div class="fb-comments" data-href="<?php echo $currentUrl; ?>" data-num-posts="5" data-width="700" data-colorscheme="light"></div>The attributes of the div block can change to match your needs. 'data-num-posts' is the maximum visible comments. 'data-width' is how wide in pixels you want the widget to be. 'data-colorscheme' can either be 'light' or 'dark' which refers to the theme of the widget. Refresh your webpage.
Congratulations! You are all set to start using the Facebook comment widget!
How to Moderate Your Visitors' Comments?
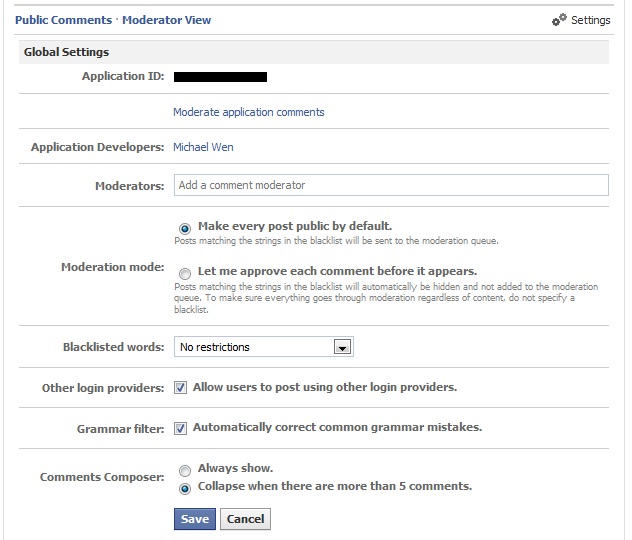
First make sure you are logged into Facebook with the same user ID as the one you just set. Refresh your page and you should see that you are the moderator of the comments. Here's an example screenshot (after I click 'Settings'):

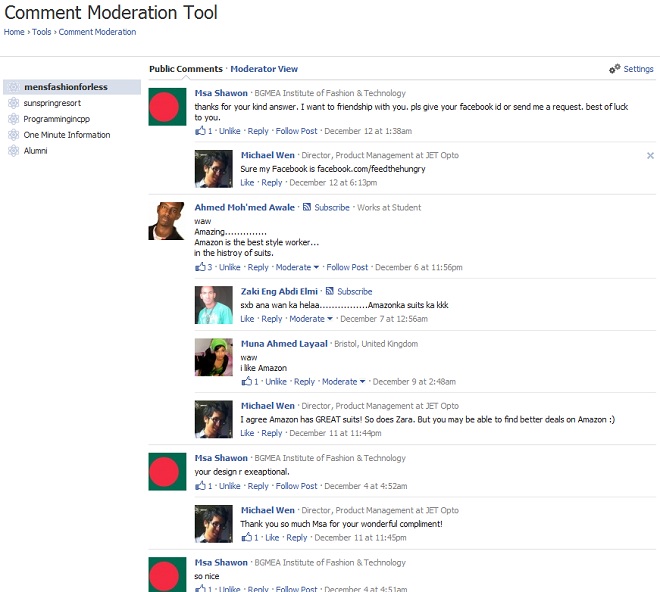
Click on 'Moderate application comments' link and you'll see the following:

Now you can go ahead and do anything you want with comments left on your website. You can Like them, Reply to them, Delete them, etc.
How to Control the Background Color of the Comment Widget?
Sometimes you'd like to change the background color of the comment widget. Simply insert the following code in the CSS file used by your website (assuming you want to set the background color to purple):
.fb_iframe_widget {
background: purple !important;
}CaveatsNote that there may be a delay after you've finished step 2 before the widget shows the moderator view. Wait about one hour and refresh the page and you should see the moderator view.
If you have any questions let me know and I will do my best to help you!


